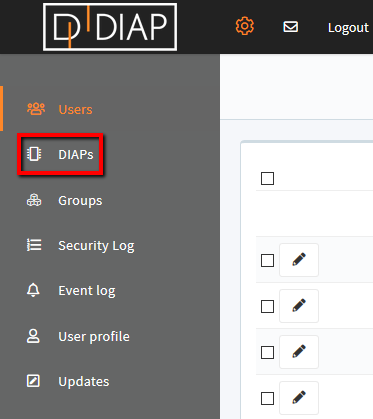
Click the 'Cogwheel' in the top left menu.
Select 'DIAPs' in the menu.
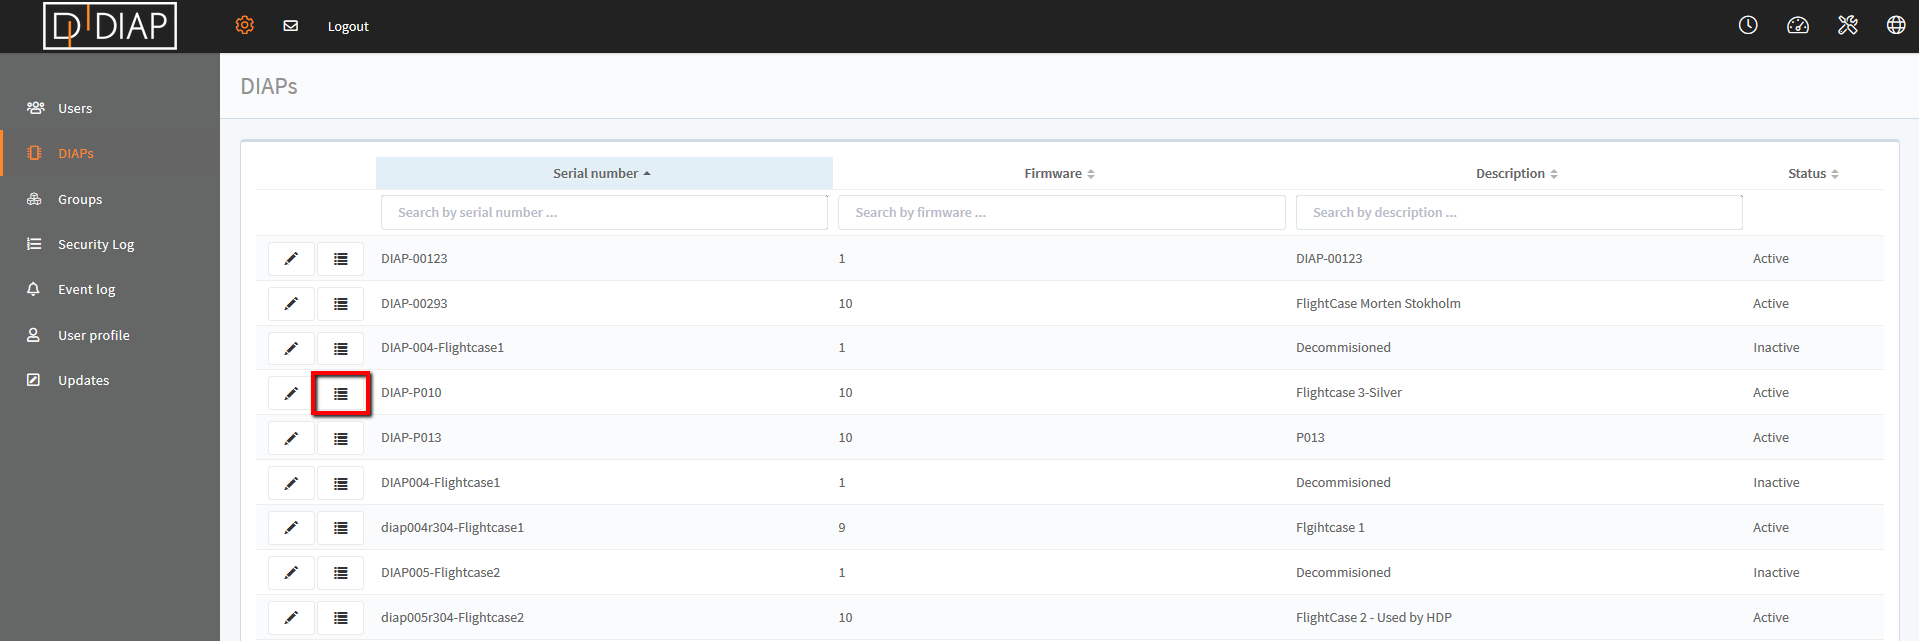
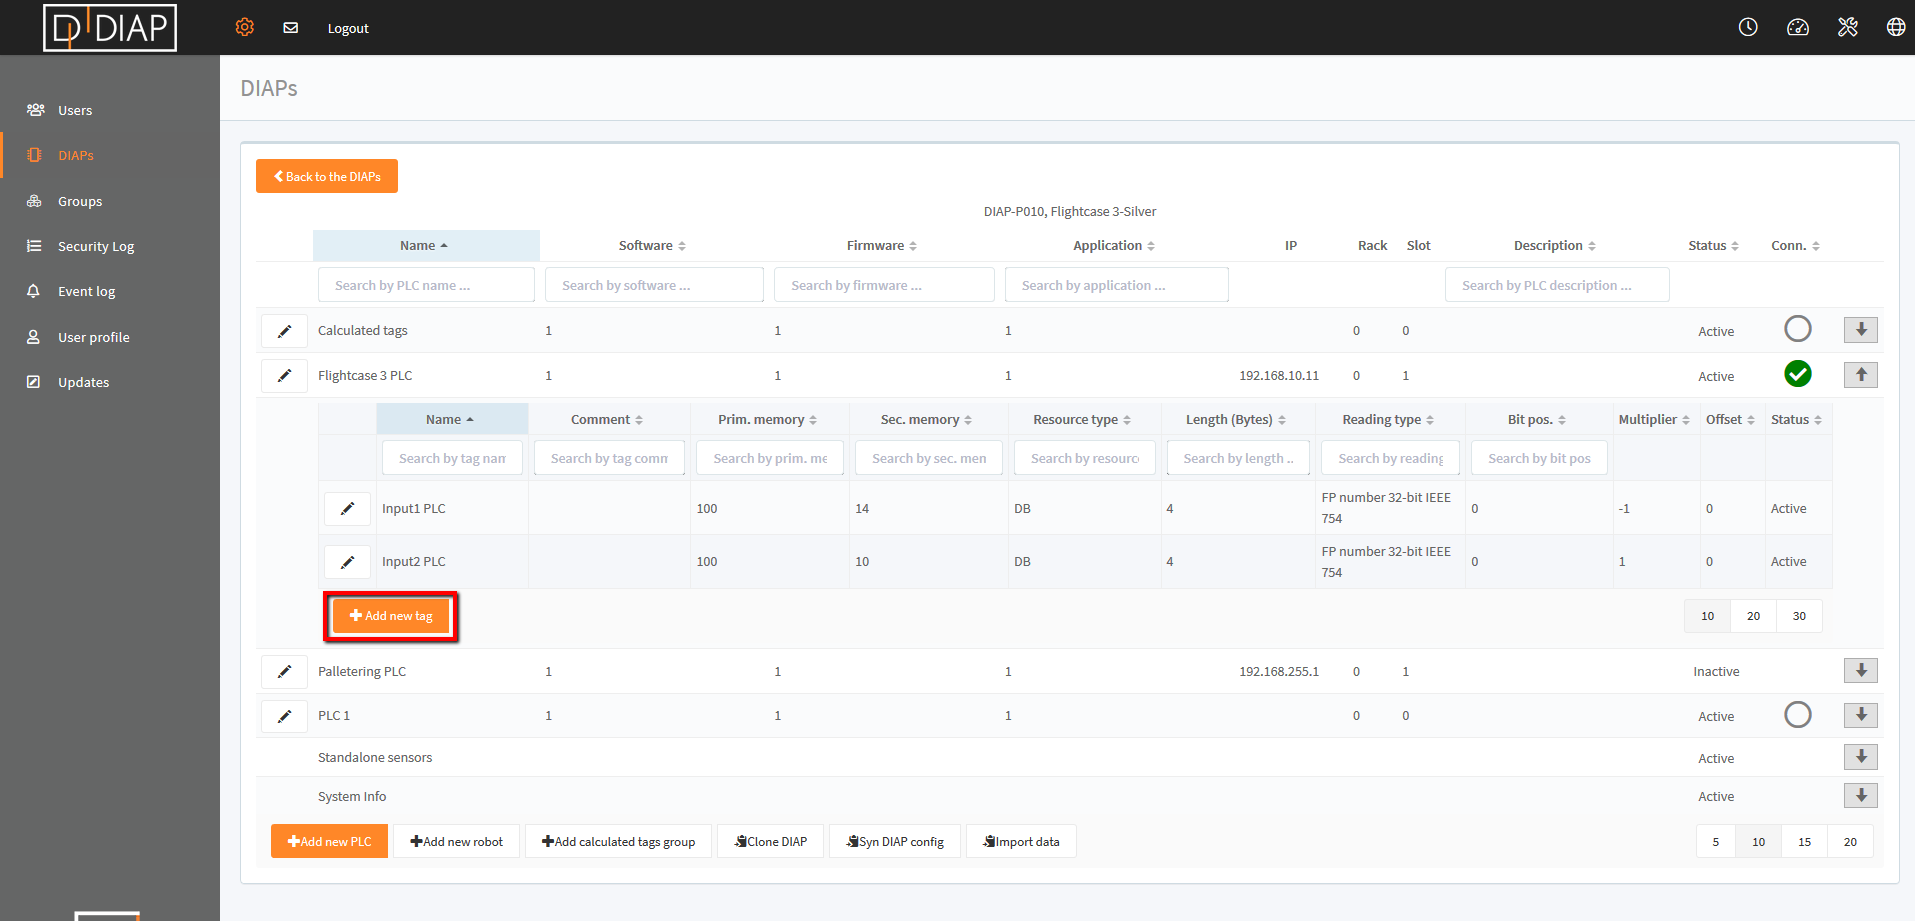
Find and select the DIAP for which you want to add/edit a PLC - click the icon 
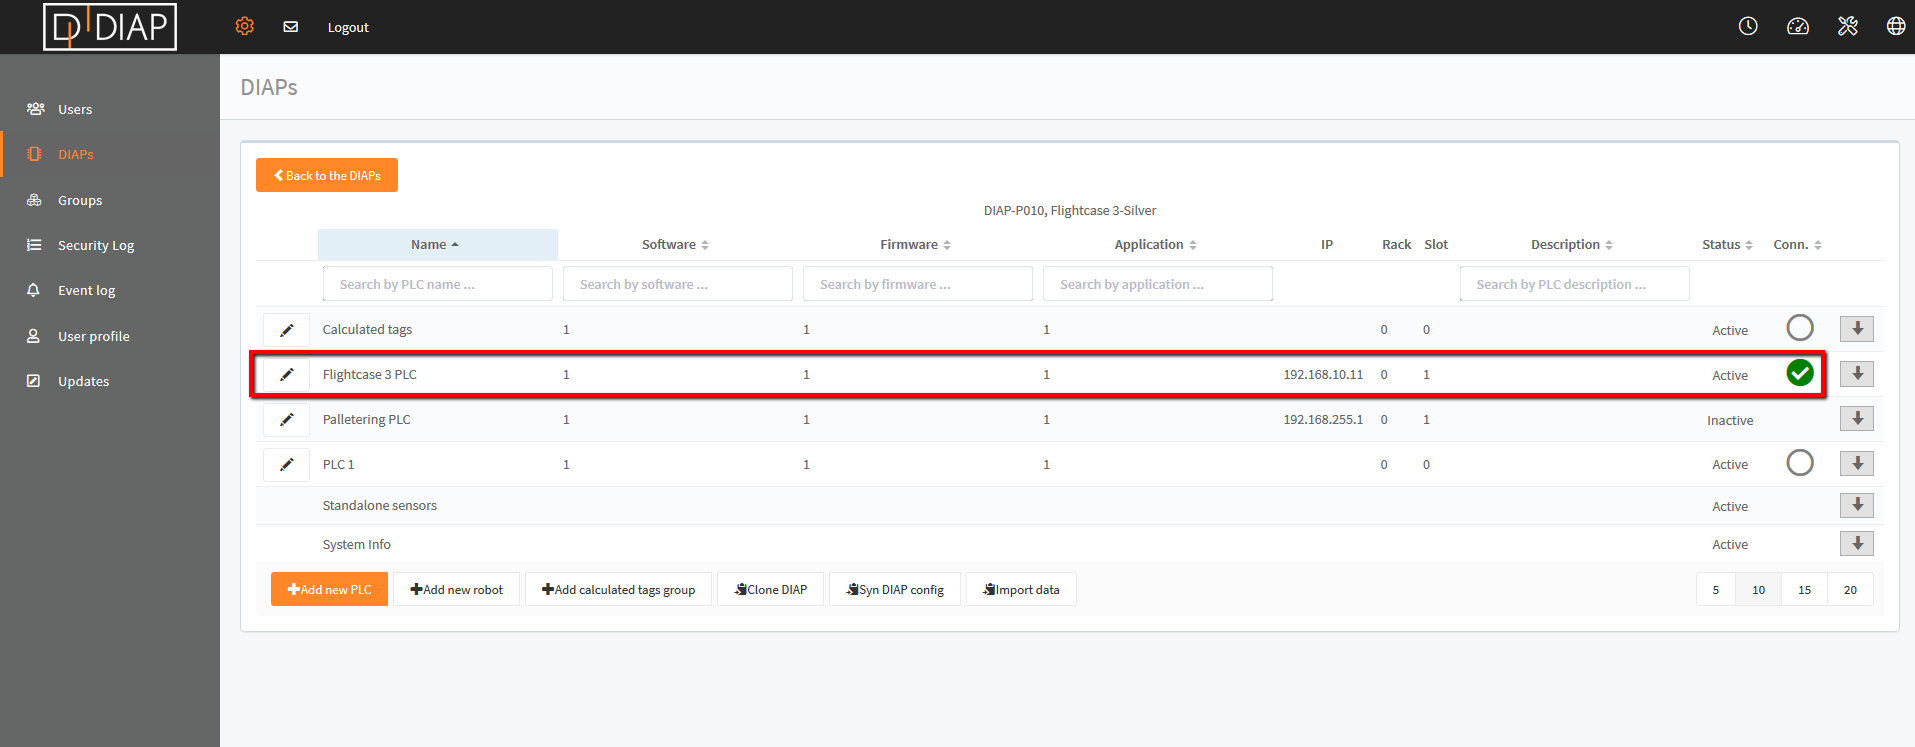
Select and expand the list of the PLC for which you want to add tags.
Click the 'Add new tag' button.
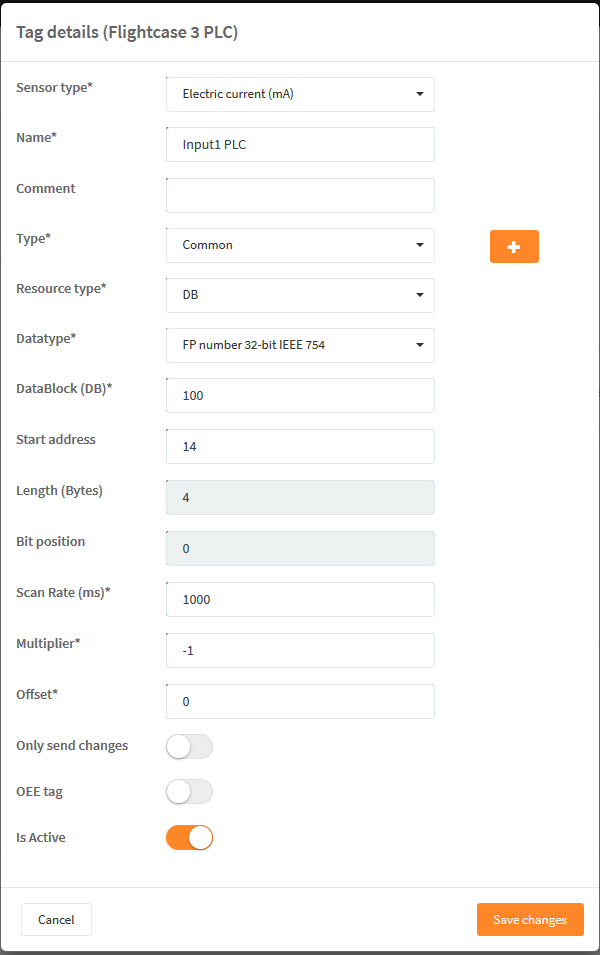
A pop-up will appear. Fill in the required information.

Field explanation (fields may vary depending on PLC brand):
- Sensor type: Select sensor information (what type of data is collected from the tag). E.g. voltage, temperature, acceleration etc.
- Name: Enter a tag name.
- Comment: Enter a tag comment. The text entered here will only be displayed in the column 'Comment' in the table.
- Type: Choose sensor type. You can create a new type using the plus sign (+). This is a sensor category.
- Resource type: Choose resource type. (For Siemens e.g. Counter, DB, In, Merker, Out, Timer).
- Datatype: Select the data type required to read information from the PLC. (For Siemens e.g.: Binary tag, Binary tag counter, Date, Date/Time, FP Number - text conversion, FP number 32-bit IEEE 754, FP number 64-bit IEEE 754, Signed 16-bit value, Signed 32-bit value, Signed 8-bit value, Text tag 16-bit character set, Text tag 8-bit character set, Time, Unsigned 16-bit value, Unsigned 32-bit value, Unsigned 8-bit value).
- Start address: Enter the start address of the tag in the PLC.
- Length (Bytes): Length will be determined by the selected datatype.
- Bit position: Dependig on your selection in datatype, you can enter the bit position.
- Scan Rate: Define in milliseconds how often data is to be collected from the PLC tag.
- Multiplier: You have the option of entering a multiplier to get the correct value from the PLC tag.
- Offset: You have the option of entering an offset to get the correct value from the PLC tag.
- Only send changes: When enabled, the PLC tag will only send new data when the value changes. When disabled, data will be collected each 1000 ms (if 1000 ms is entered in Scan Rate).
- OEE tag: When enabled, the tag can be used for OEE configuration. Always enable the toggle if you wish to use the tag for OEE measurings.
- Is Active: When enabled, the PLC tag is active and will appear. When disabled, the PLC tag will be hidden.
Please see an example:
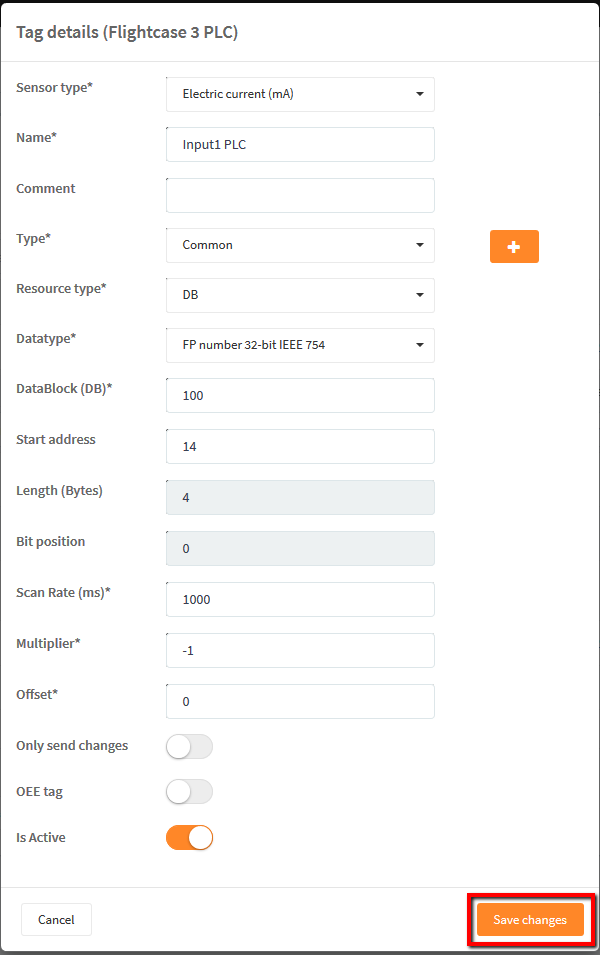
Remember to 'Save changes' when finished.
The PLC tag has now been saved.
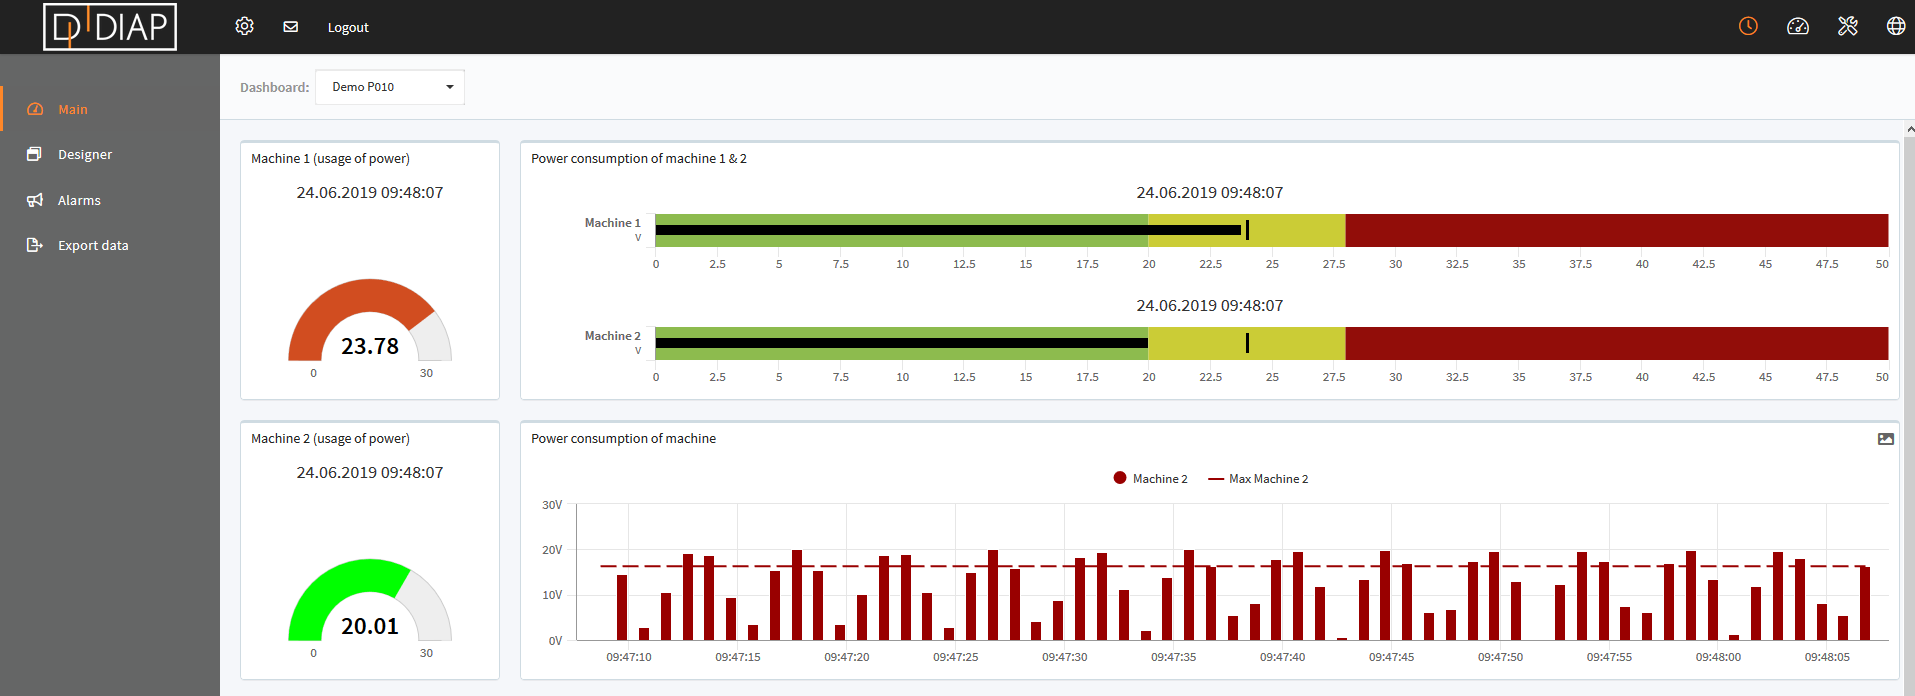
You are now ready to add more tags or visualize data from the PLC tag.
** If you cannot access data from the PLC, then please take look at: Configuring DIAP to reach PLCs