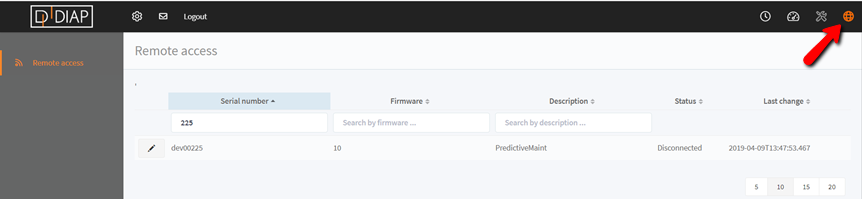
Click the globe in the top right for Remote Access.
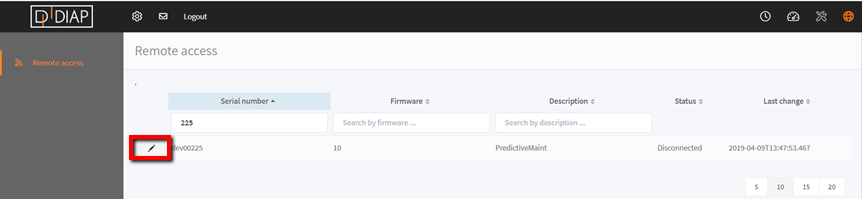
Find the device you wish to setup Remote Access on, and click the pen.
In the dialog box you open you can see existing (if any) connections.
To make changes the device needs to be in the “Disconnected” state.
To add a new connection click “Add new”, or to modify an existing click the pen next to it.

In the configuration panel select the desired ip (the ip of the remote device, eg. the PLC).
Then specify which Port you want for configuration (see list of commonly used ports below).
The remote port is the port used on the remote device.
The local port is the port you wish to use locally.
There are three options to choose from for mapping the configuration on your pc.
- Local loopback, is a lightweight configuration option. It is recommended for mapping websites, and remote desktops.
- Map to all adapters can be used if the loopback adapter (local host/127.0.0.1) is not possible in client software.
- Replicate remote IP address is similar to traditional VPN’s which require a local virtual network adapter to be used. This option is currently for advanced users. It is mostly used with PLC software, with strict IP rules, such as Tia Portal.

Repeat the process for each tunnel needed.
When done, press the “Disconnected” switch so it says “Connected”
Then Click Download script, and make sure the connection script is being downloaded.
Finally click save changes.
Starting a session
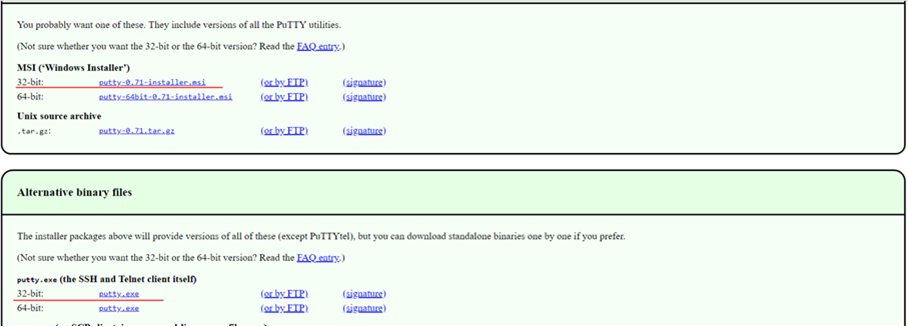
In the current version of remote access you will need to download the open-source software Putty (https://putty.org/) the first time you use the software.
Putty is a commonly used SSH and telnet client.
Navigate through the putty site to the download page and find the 32-bit version of the software. You can choose either the windows installer or the a standalone binary to avoid company installation restrictions.
NB: Choosing 64-bit or a standalone version of putty will require minor changes to the downloaded DIAP script. This is explained below.
After installation of Putty 32-bit, you can start the bat script “open-remote-conn.bat”.
Depending on the windows version you may be confronted with a windows SmartScreen protection. This is because we initiate a remote connection to your virtual machine on Azure.
Click “More info”
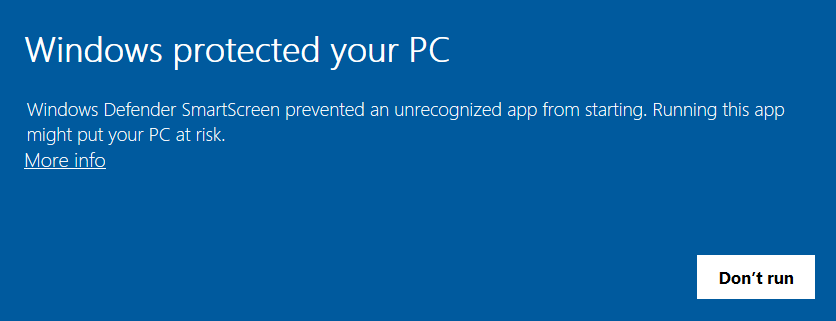
Then select “Run anyway”
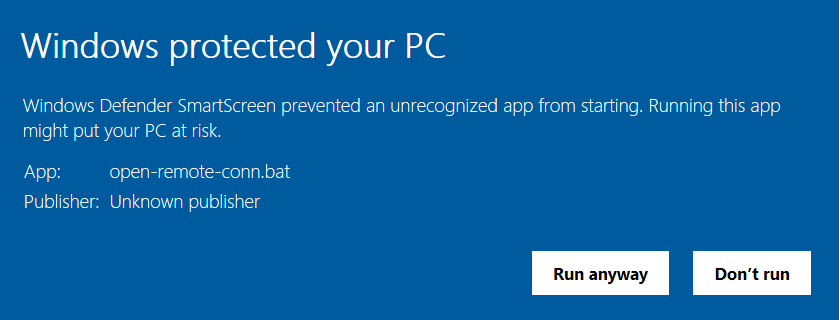
The connection is now established.
Troubleshooting: putty version
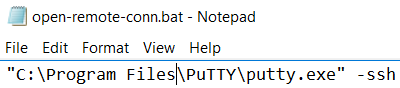
If you selected 64-bit putty, 32-bit standalone putty, or a non-standard install location the simple script cannot locate the putty executable needed.
Open the open-remote-conn.bat in a text-editor and change the path accordingly:

64-bit:
Standalone Putty in the same folder as the open-remote-conn.bat:
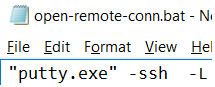
Or specify the address where your Putty installation resides.