Introduction
This guide describes the local configuration of a DIAP. It is to be used when DIAP is unable to connect to the internet and must be configured locally.
Prerequisites
To be able to follow the steps described in this guide, the DIAP firmware must be updated to version 7 or higher.
There is a local website for configuration of all DIAPs (version 7 or higher).
The default DIAP IP address is: 10.1.14.57 (unless it has been deleted by a administrator - check the DIAP and the Ethernet setup in the Cloud for more information).
The device that is to be locally connected to DIAP must be on the same subnet as the DIAP.
MUST: Remember to make the configuration on the website before altering the local configuration of the DIAP. The DIAP will collect the configuration of the cloud as soon as it is connected to the internet.
Step-by-step guide
Please follow this step-by-step guide to configure DIAP locally.
Change IP address and subnet
1. Connect DIAP to your PC by means of an Ethernet cable (use Ethernet port 1 on the DIAP).
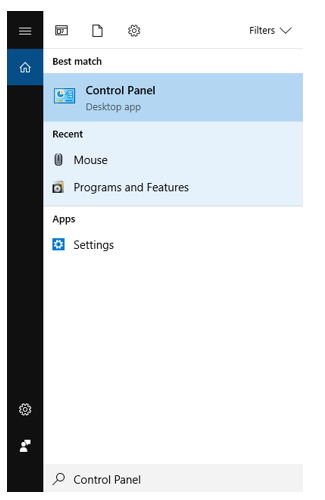
2. Search for “Control Panel” on your PC and open it.
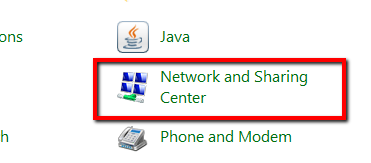
3. Select "Network and Sharing Center"
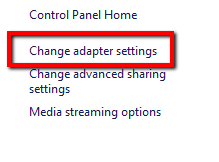
4. Choose "Change adapter settings" from the menu in the left side of the window.
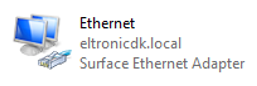
5. Select “Network Connections”. The icon shown to the left will be displayed.
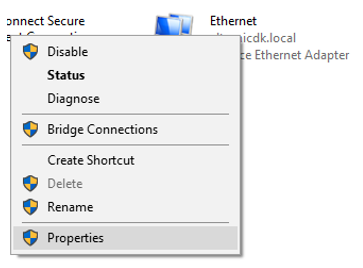
6. Right-click on “Ethernet” and select “Properties”.
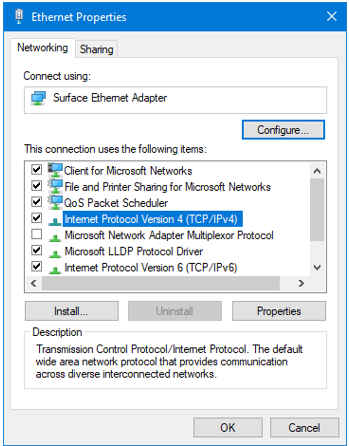
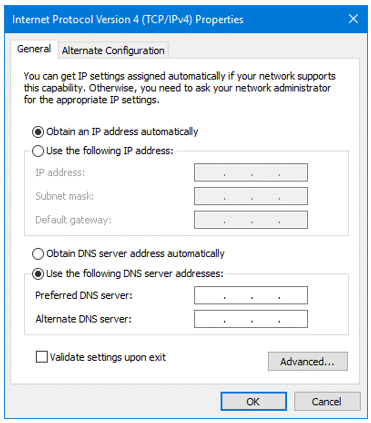
7. Choose “Internet Protocol Version 4 (TCP/IPv4)” and click on “Properties”.
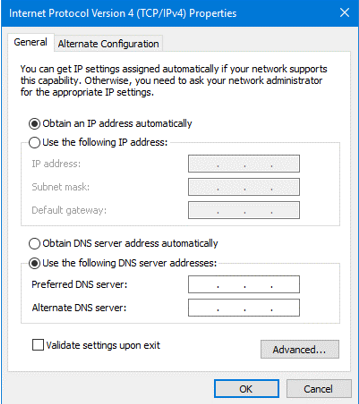
8. This will open the window shown at the left. If you have custom settings, be sure to write them down.
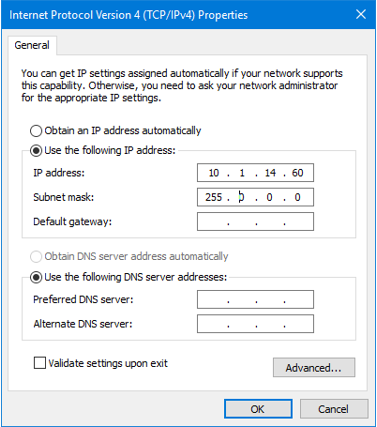
9. Choose “Use the following IP address”, and fill in “IP Address” (see example).
10. The IP Address must be “10.1.14.X”. X can represent any other number than 57 - cannot be .57.
11. “Subnet mask” will be filled in automatically.
12. Click “OK” in all windows.
Revert settings
- In order to revert the settings after configuring DIAP, go through the above steps and select “Obtain an IP address automatically” displayed in the window to the left. Alternatively, use the custom settings written down (step 6).
Local website
- You can access the DIAP local website from any web browser. Use the following URL (if DIAP default settings apply): http://10.1.14.57:8080/static/index.html#!/
- If you have changed the IP address previously, please make sure to use that IP address and not 10.1.14.57
- Use the following login (it is also possible to use your own administrator login)
Email: diap@eltronic.dk
Password: Password123
(You may have received a password by e-mail. If so, use that password).
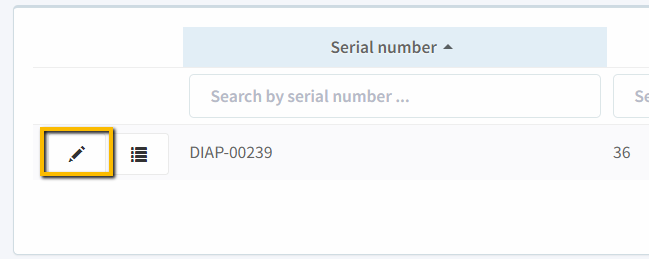
Please contact DIAP support, if you experience any login problems. - When logged in, select DIAPs in the menu.

- Click the “Pencil” icon of the DIAP to be configured.
- You can now set up the DIAP to connect via WiFi, 4G or Ethernet (it is also possible to configure static IPs).
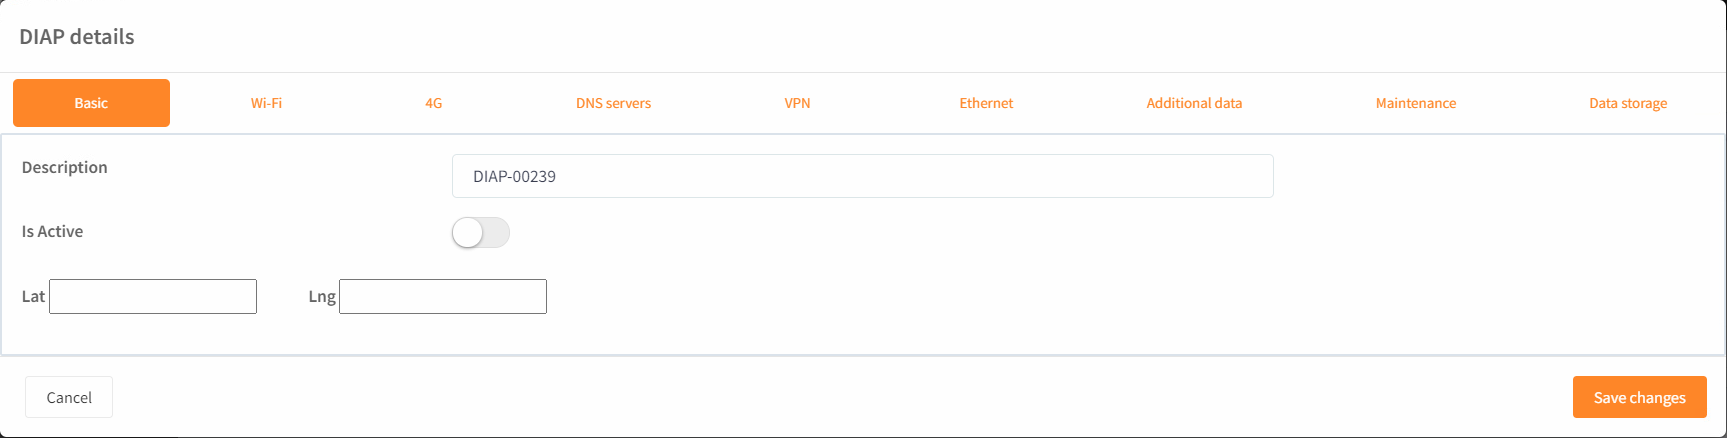
- Select if you want to edit the Wi-Fi, 4G or Ethernet
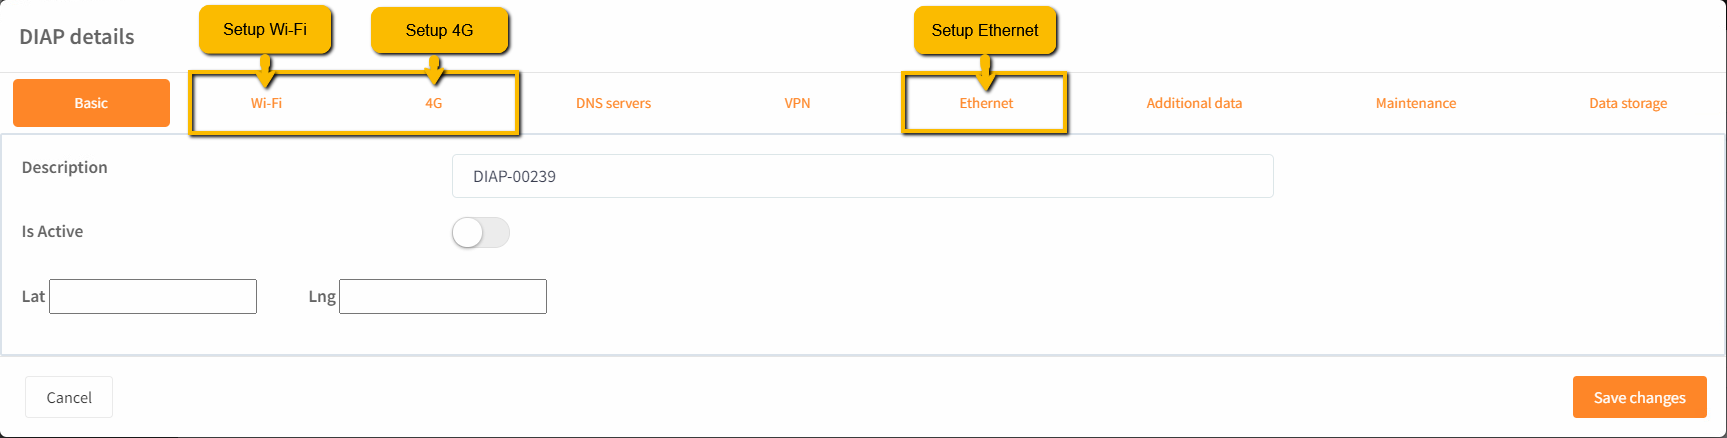
- Remember to click “Save changes” when done.
If you experience any issues with this, then please contact the support desk on support@dataintel.dk and an DIAP employee will guide and assist in getting the correct configuration.