Purpose of alarms
Alarms warn you when individual tags or multiple tags are exceeding some user-defined boundary. These warnings can be sent either as an e-mail, SMS, or monitored directly in the widgets dashboard. Furthermore it is possible to send an alarm in a certain interval.
How to setup regular user-defined boundary alarms
New alarms can be created in the real-time interface by selecting "Alarms".

When creating a new alarm (or when editing an existing alarm), a fitting description should be selected, as this is the text that is going to be presented later on when the alarm is triggered.
The alarm type is a list of alarms that can be triggered. Two alarm types has been predefined: Warning (in yellow) and Critical (in red). These can be modified and more can be added as needed. When creating a new alarm type, a name and a color needs to be picked.
The selection of the tags that should be monitored by the alarm can be done by either using the tag type or using the normal tag selection process DIAP -> PLC -> Tag. Only selecting DIAP or DIAP -> PLC will select all tags on the DIAP and PLC respectively.
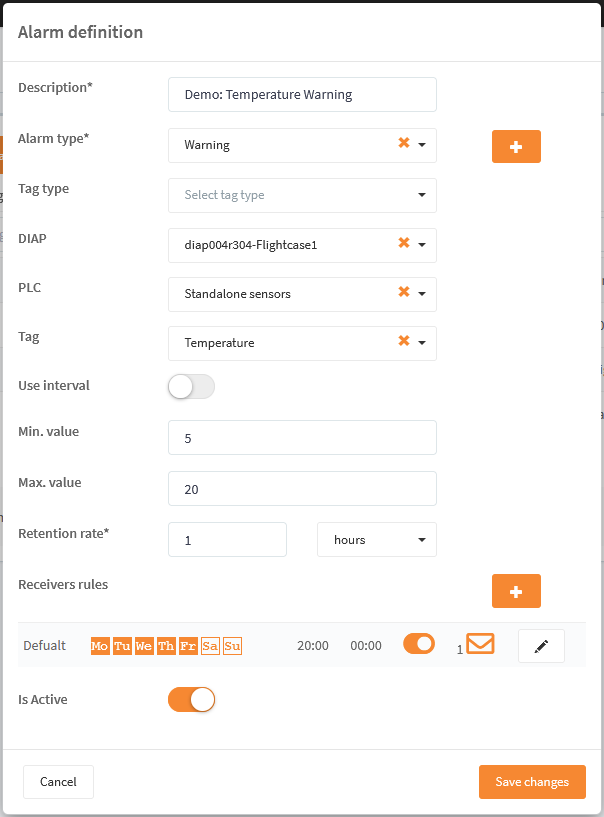
The alarm threshold options are currently to select a min. value, a max value or both. The alarm is triggered when these values are exceeded.
The retention rate, is the rate at which the alarms are sent.
Receivers rules
Receivers rules specifies which days and time of the week the alarms is allowed to notify via mail or via SMS.
Rule name is the name of the rule. Active days are the days of the week, that the alarm may notify one. From and To is period of the day, that the alarm may notify one. To cover all day set From to 00:00 and To to 00:00. E-mail receivers are the email addresses that will receive an email. Sms receivers are the numbers, that will receive an SMS.
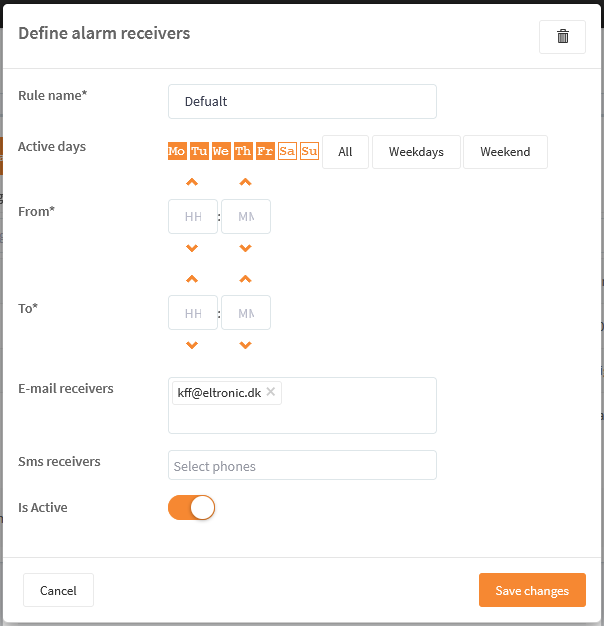
E-mail and SMS receivers need to be filled in for the alarm to send notifications. They are not needed if the alarms just need to be monitored from the widgets in the dashboards.
Use the + button to add more rules:


How to setup interval alarms
Interval alarms can be useful if you wish to get an alarm once an interval has been reached. This could for example be every 1000 hours a machine has been running or for every 5 000 product that has been produced.
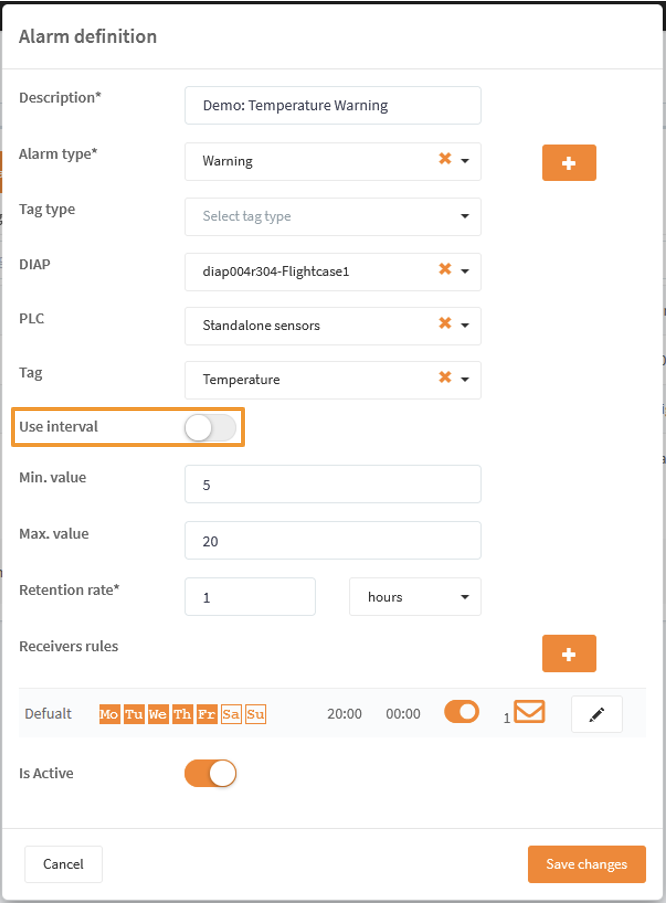
How does one create an interval alarm? Once the the "+ Add new" has been pressed, then there is a slider that can be active for "Use interval", see screenshot below.
Once the slider has been made active for "Use interval" then the following will be shown and replace "Min. value & Max. value":
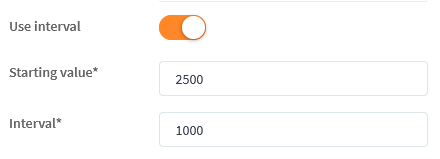
Starting value = When shall the interval start from. In the above example, then the interval will start once the tag has reached an integer of "2500".
Interval = What shall the interval be once the starting value have been reached.
The above alarm will give an alarm at: 3 500, 4 500, 5 500, 6 500 and so on. Basically every time the tag has increased by 1000 from the starting value of 2 500.
Interval alarms doesn't use Receivers rule.